Something about fall stirs the creativity in me. Suddenly – almost overnight – I lazy days of summer disappear and I have energy to cook and craft and bake like I haven’t in months. Something about the cooler temperatures breathes new life into my creative side. And that’s exactly what happened today. I woke up with the desire to create something very fall…except time wasn’t exactly on my side. With the girls off of school, they each had camp and field trips to get to on opposite sides of town, plus I had to work. Whatever I was going to create had to be a quick.
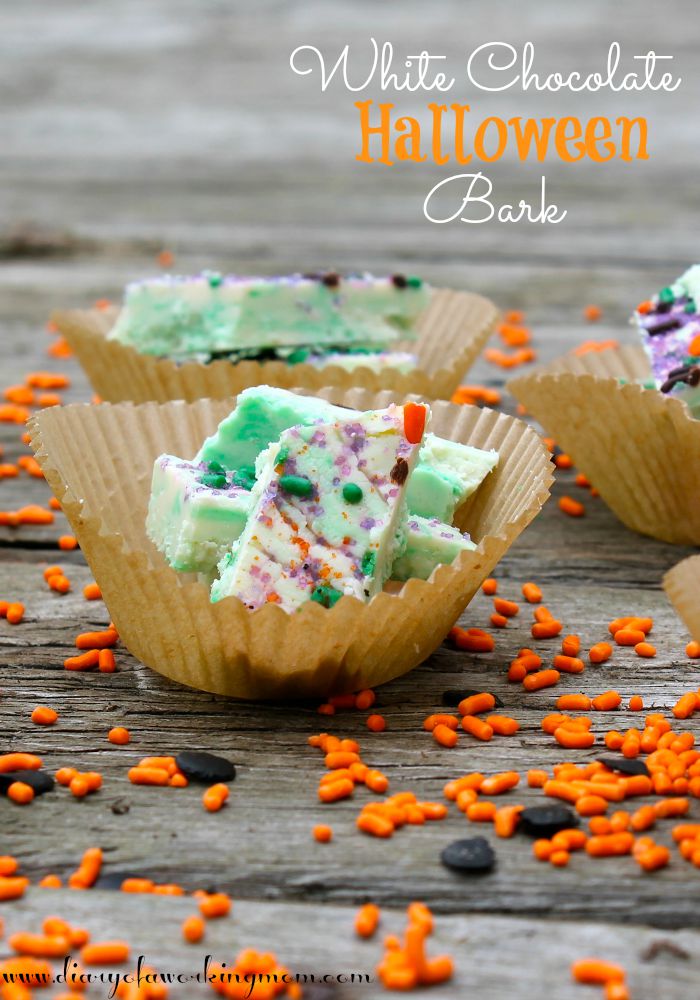
With the kids finally at their respective activities, I decided it was time to break out an easy recipe that I’ve been wanting to try – White Chocolate Bark! I’ve made frozen yogurt bark before, but never chocolate bark, and white chocolate is my absolute weakness. And with just over a month until Halloween, I decided this was the perfect time to give it a little Halloween color. Very quickly, my plain white chocolate bark became White Chocolate Halloween Bark!
Ready in as little as 45 minutes (including prep time) this no-bake recipe is perfect for that last minute school function or Halloween party, and the sprinkles make it extra festive. This White Chocolate Halloween Bark was a hit in our house! We will definitely be making it a lot this fall season!
You will need:
1 12oz bag white candy melts
Green food coloring (you could also use purple or orange, depending on your preference)
Sprinkles (purple, orange, black)
Aluminum foil
Step 1 – Cover cookie sheet with aluminum foil and spray with non-stick cooking spray.
Step 2 – Place the candy melts in the microwave and heat for 60 seconds. Remove the bowl to stir the chocolate. Once stirred, return the bowl to the microwave and heat on 30 second intervals (stirring in between) to ensure that the chocolate doesn’t overheat.
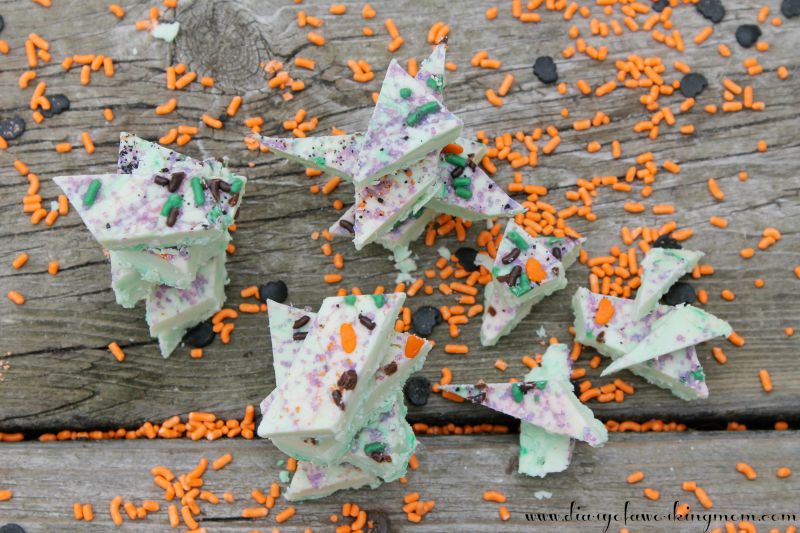
Step 3 – Once the chocolate is completely melted, stir until smooth. Add a few small drops of green food coloring to the chocolate, stirring the color (but not completely). You’re going for a swirled or marbled look, so be careful not to over stir, just a few strokes to distribute the color.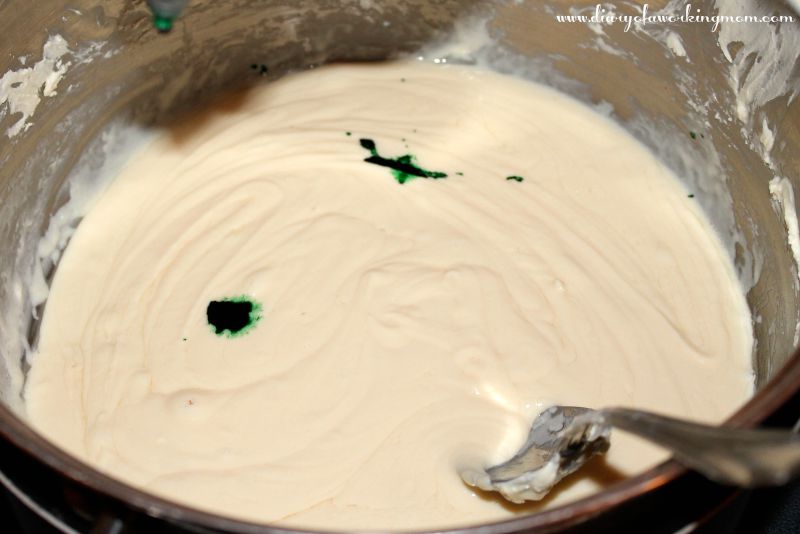
Step 4 – Pour the chocolate onto the foil-lined cookie sheet and spread until thin and even. Top with sprinkles. The more, the better.
Step 5 – Refrigerate for a minimum of 30 minutes or until set and then cut into pieces. Honestly, the longer you can refrigerate it, the better, but if you’re in a pinch, it should be ready in as little as 30 minutes.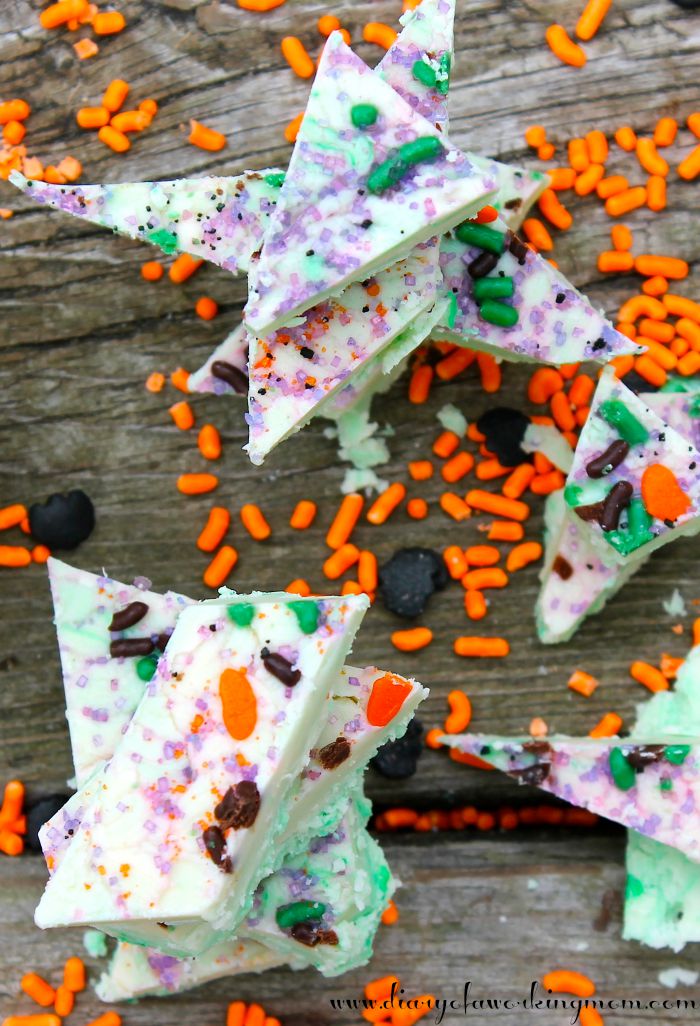
Tip: This bark might become soft if it sits out for an extended period of time. It’s best to store this bark in an airtight container in the refrigerator if there’s any left…which their probably won’t be.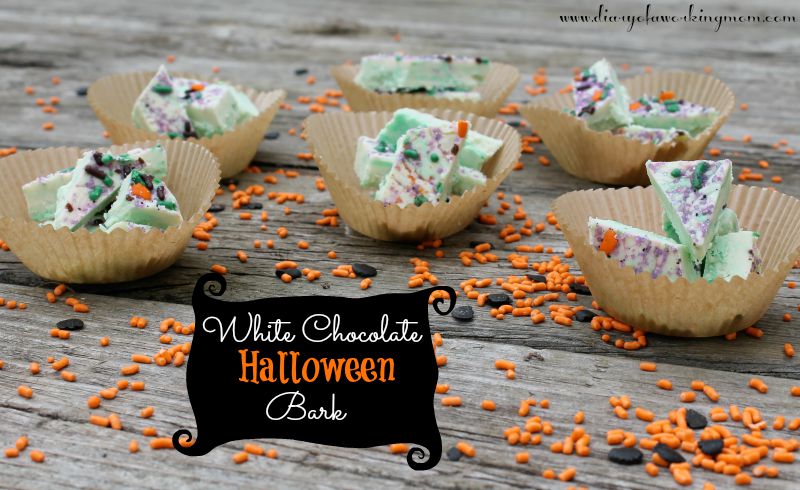
Enjoy!