 In case I’ve never mentioned it before, I love St. Patrick’s Day. Absolutely love it! It’s probably my Irish heritage, but I can’t let the holiday slip by without celebrating. A long time ago, my husband and I would throw a huge party to celebrate, but in recent years, picking out green clothes to wear and crafts for the kids have been much more my speed. Oh how kids change things…
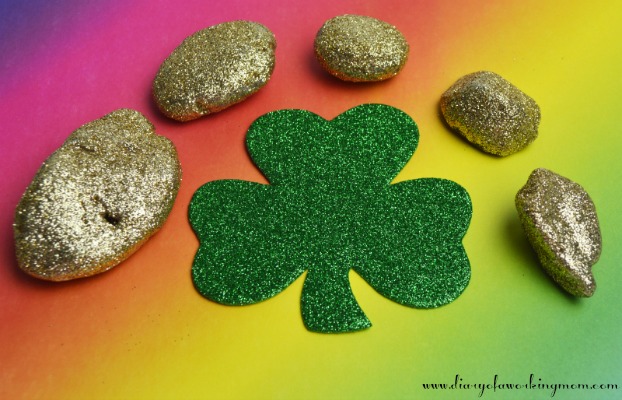
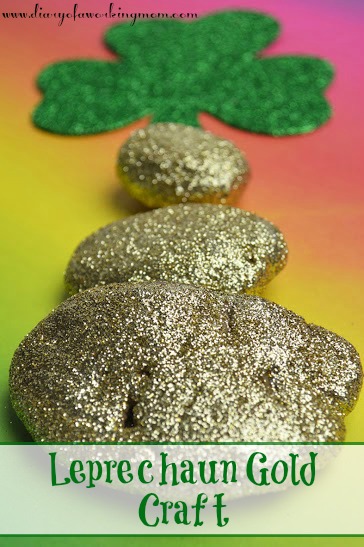
Sometime around this time last year, I saw an adorable gold coin St. Patrick’s Day craft for kids, but as it often happens, I ran out of time before I could actually sit down and make them. Unwilling to write off the project altogether, I printed the instructions and tucked them away for the next time because I just knew that this was the perfect craft for my girls. Plus, making the coins involved using glitter and glitter might possibly be their most favorite thing in the entire world. This craft was totally going to make their day…but when I went looking for coins to decorate at the dollar store, I couldn’t find any. In need of a quick solution (I had promised my girls glitter and they weren’t going to let me forget it!) I decided to make gold rocks or “nuggets”.
I won’t lie – this craft gets a little messy when you get little hands involved, but it was very worth it. In fact, I think they turned out better than the gold coins I originally planned to make!
You will need:
River Rocks or Stones
Fine or Extra Fine Gold Glitter
Mod Podge (matte finish)
Craft Foam Brush
Step 1 – Clean and dry your rocks. This step is especially important if you find your rocks outside, but can still be done if you purchase your rocks (I found mine at the Dollar Tree).
Step 2 – Using your foam brush paint a thin layer of Mod Podge onto a rock or stone. You can only glitter one side at a time, so make sure to only Mod Podge one small section of the stone at a time. Since my kids are still small, I let my girls do the layer of Mod Podge and then I smoothed it out.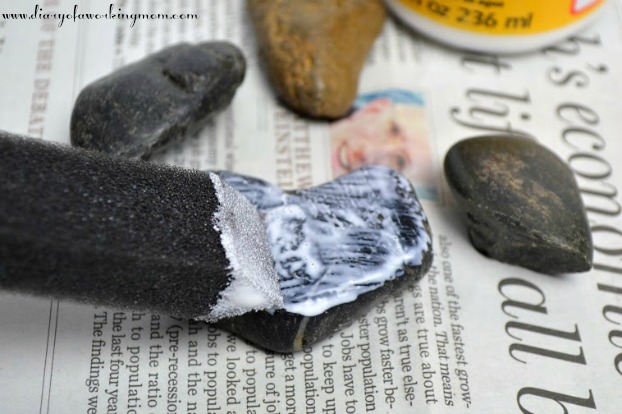
Step 2 – While the Mod Podge is still sticky, lightly sprinkle some of the gold glitter over the area where the Mod Podge is applied.
Step 3 – Gently tap or shake the rocks to remove excess glitter and avoid clumps.
Step 4 – Allow the area to dry completely.
Step 5 – Once the first area is dry you can work on other sections of the rock until the entire rock is covered in glitter. (I started with the top then worked on the sides then flipped over to do the bottom).
Step 6 – Once your rocks are completely dry you can coat the entire rock with a thin layer of Mod Podge (it dries clear) to seal the glitter. This will keep glitter from rubbing off onto other surfaces or coming off on little hands when they play with their newly found leprechaun treasure!