I wanted to get a few picture frames for the Christmas pictures that I posted here, but then I thought, “why not make them myself?”. I thought I could paint them then maybe use scrapbook embellishments to dress them up a little. Easy enough, right? But then I remembered a tutorial that I saw on the internet a while back where you used Mod Podge to decorate the frames with scrapbook paper. I had never used Mod Podge before and decided this was the perfect opportunity to try it out.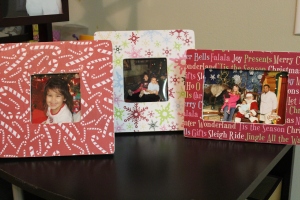
What you will need:
wood picture frame (normally $1 at Michael’s)
Piece of scrapbook paper
Mod Podge
Foam paint brush
Paint
X-acto knife
Sand paper or nail file
Cutting pad/board
Step 1 – With the foam brush, paint the back side of the picture frame, along with the outer edges and the edge inside picture window. You do not need to paint the front of your frame, because that will not be visible (you are about to cover it with paper). You want to pick a paint color that compliments your scrapbook paper. Allow paint time to dry. I originally tried to do this on newspaper, but the paper stuck to my frame and I had to start over. I then decided to grab some cans from the pantry and keep the frame elevated while it was painted and drying.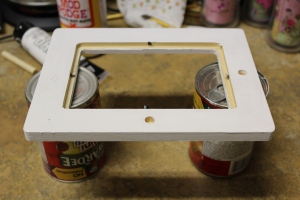
Step 2 – Cut the scrapbook paper down to the size of the frame. You don’t want to cut it to the exact size of the frame, leave a little extra paper on each of the sides. Don’t cut out the middle (picture window). This isn’t a necessary step, but cutting it down made it much more manageable than using the entire 12×12 sheet.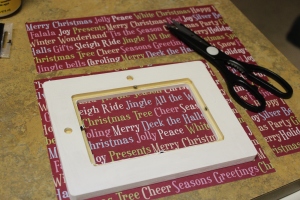
Step 3 – Paint the front of your frame with a thin layer of Mod Podge, using the foam brush.
Step 4 – Place your piece of scrapbook paper on table, design side down. Place the frame, Mod Podge side down, on top of the piece of scrapbook paper, so you are gluing the two together. Press down firmly.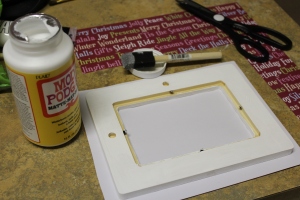
Step 5 – Turn the frame and paper over so you are looking at the front of the frame. Rub the edge of a credit/debit type card (AAA card, hotel key card, library card, whatever you’ve got) along the front of the frame, so as to press out any bubbles that may be trapped underneath.
Step 6 – Allow Mod Podge time to dry. About an hour, maybe less. Place frame on the cutting pad/board and use the xacto knife to trim down the excess scrapbook paper, but don’t worry if you can’t get it perfect. Rub the sand paper or nail file along the edge of the frame to trim down the excess paper.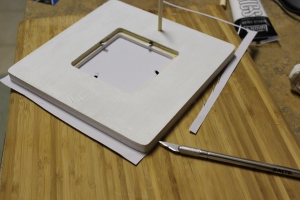
Step 7 – Using the foam brush, cover the front and sides of the frame with Mod Podge. It may look white at first, but don’t worry, it will dry clear. Allow time to dry.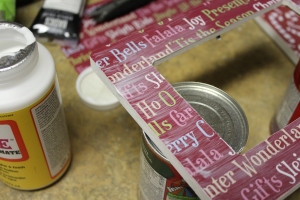 Viola! Beautiful frames!
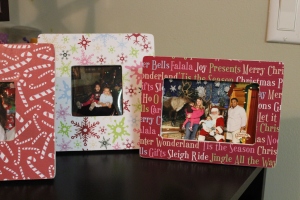
I absolutely love how these came out and I can’t believe that I made them. I have seen frames exactly like this in gift stores for $9+, but I made them for about $2. I wish I had done this project a little sooner, they would have made great gifts for the grandparents or teachers at the girls’ daycare. I see grandparent gifts in the near future!
Have you ever worked with Mod Podge before? I hadn’t. After this experience, I’m just going to come right out and say it – ModgePodge is my new BFF. The possibilities are endless.


This is lovely and definitely something I will try. Very good post.
I take a lot of pictures, so I am always looking for good frame ideas! Thanks!
These look so great. I really couldn’t tell from the first picture that they were homemade! I am stopping by from Wobble Over Wednesday. I am already a Facebook fan and G+ follower so I am now following you on Twitter. I hope you will stop by my blog @ http://www.naturallyhealthyparenting.blogspot.com Thanks. Have a great day.
That’s a really good idea. Your frames turned out really well 🙂
I especially like the one with the words on it 🙂
~Lisha
I just followed this post and made Easter frames for my family! Worked great! Thanks 🙂
I’m so glad they turned out great! So easy, right? I haven’t made anymore, but I’ve been meaning to.
Just wanted to share, I dry my freshly painted frames on hangers they work great!!!
Great idea!
These turned out cute. Now im ready to bring out my crafty side and make a few decorative frames!
Pingback: Crafty: Easy Photo to Wood Transfer - Diary of a Working Mom
Just had a girls’ weekend with my nieces. Had a husband take our picture together, printed one for each of us, then used your instructions to make frames for them. Fabulous! Had some bumps after gluing the paper on the frame, but they all came out after the final coat of Modge Podge. None of us had ever done this before and it was great fun!
Suzze – What a great idea to make a girls night out of it! Love it! And I’m so glad that your frames came out well. I’ve made a few of these frames and although most of them came out perfect, there are one or two that have a bump or two (probably because I was short on time and didn’t smooth them out enough). I guess that’s how you know it’s handmade!
Mine turned out TERRIBLE. So many bubbles that I worked very hard to get out but couldn’t. . Did this 3 different times with the same results. Totally frustrated.
Oh, Jane, I’m so very sorry. And I don’t blame you one bit for being frustrated. One question though – were you using regular paper or cardstock/scrapbook paper? When I made mine, I used several types so it should matter, but I’m wondering if thicker paper would help. You probably don’t want to try again, just a thought though. I feel bad that this didn’t work out for you.