In mid-September, I was going through some of my old scrapbooking supplies when I found some Halloween embellishments. I haven’t scrapbooked in quite a while – mostly due to lack of time – and I felt bad that so many supplies were going to waste. And then I had an idea. What about using those embellishments to make some Halloween hairclips for the girls? They absolutely love hairclips and I already had a ton of metal alligator clips left over from my owl hairclip project. All I needed was some orange, black, and white ribbon.
So during the first week in October, I headed out to the store to pick up some ribbon and put the hairclips on my list of things I wanted to get done before the baby was born. But pregnancy exhaustion took over and naps got more appealing than hairclips. Then Everett was born, and well, not a lot got accomplished during those first 2 weeks. Which left me days before Halloween with all the supplies, but not a lot of time before the actual holiday. Instead of abandoning the project altogether, I decided to make a few simple designs that could be whipped up in just a few minutes each. I couldn’t be happier with the results and wanted to take a minute and share them with you here today!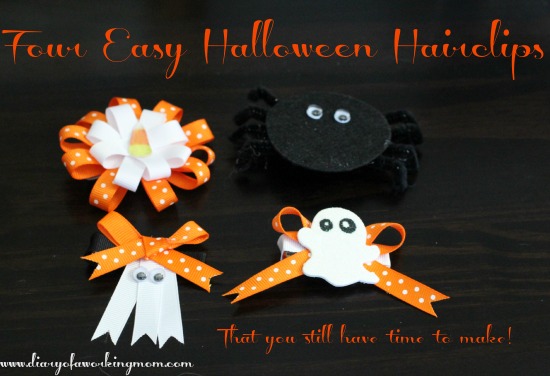
To make these clips, you will need:
3/8 inch grosgrain ribbon in assorted colors – orange, white, black
Metal alligator clips
Stiff black felt
Googly eyes
Black pipecleaners
Scissors
Hot glue & glue gun
Scrapbooking embellishments/stickers
Before getting into how to make each individual clip, the first step is to cover your alligator clips. To do this, you’ll want to open the alligator clip, put a dab of hot glue, and lay the 3/8 inch grosgrain ribbon over the glue. Continue to use small dabs of hot glue and wrap the ribbon over the alligator clip until all of the metal is covered, but be sure not to glue the clip closed!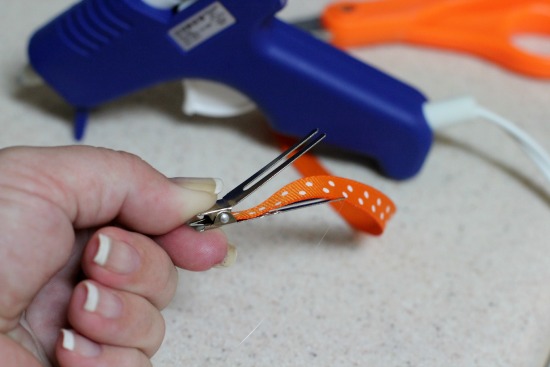
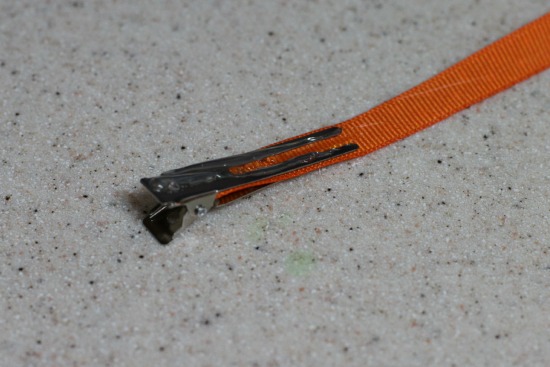 If your child has particularly fine or thin hair – like my 4 year old – you might consider only covering half of the inside of the alligator clip, that way the clip will have more grip on the hair.
Owl/Ghost: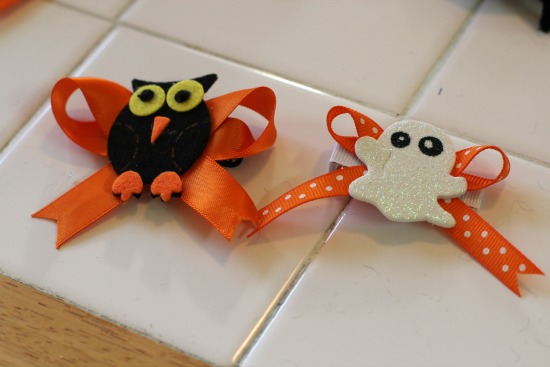 Step 1 – Cut your ribbon to 8-10 inches, depending on your preference.
Step 2 – Lay the ribbon flat. Take one end of the ribbon and twist it into one half of the bow. Use a small dab of glue to secure it. Then do the same with the other side. Glue the embellishment on to the middle of the bow.
Step 3 – Attach the bow to the alligator clip using hot glue.
Spider: Step 1 – Trace a circle on the stiff black felt and cut it out. You want the circle to be a little bigger than the alligator clip.
Step 2 – Cut the pipe cleaner into eight 1 inch sections – these will be the spider’s legs. Hot glue the legs on the sides of the felt. Once attached, curl the very end of the legs under to give the spider a bit of dimension.
Step 3 – Glue on the googly eyes.
Step 4 – Attach the spider to the alligator clip. I used the flat side of the alligator clip so it would lay flat against my girl’s head.
Candy Corn: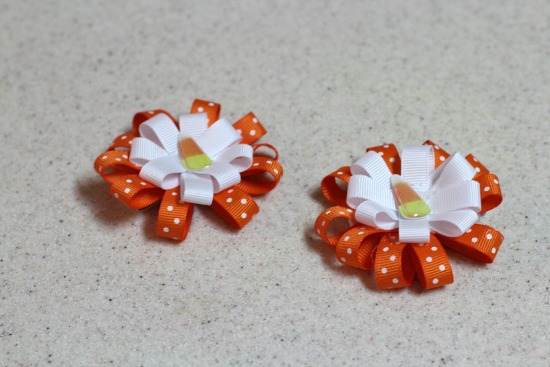 Step 1 – Cut one color ribbon into five 6 inch sections and a contrasting color into four 4 inch sections.
Step 2 – Take one of the 6 inch sections and lay it flat. Then fold the ribbon inward and attach it to the middle with a dab of glue. Essentially, you are creating 2 loops that are glued together in the middle. Once closed in a figure 8 shape, take the next piece of ribbon and do the same thing attaching it on top of the last piece of ribbon. You will need to glue both sides. Continue making these figure 8 shapes on top of each other until all pieces of ribbon are used. The do the exact same thing with the contrasting ribbon.
Step 3 – Take the 4 inch ribbon loops (here, that was my white ribbon) and lay them on top of the 6 inch ribbon loops (my orange ribbon) and glue them together. Then attach the embellishment on the top using hot glue.
Step 4 – Attach to the alligator clip.
Ribbon Ghost: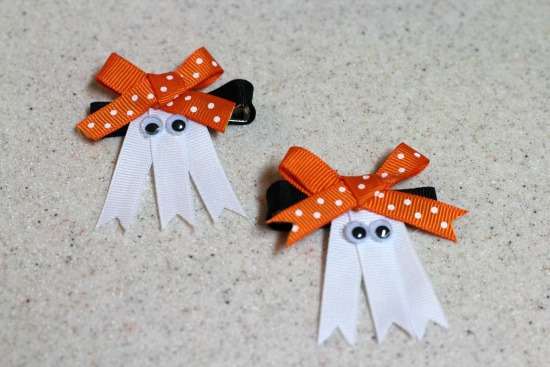 Step 1 – Cut your white 3/8 inch grosgrain ribbon into three 2 inch strips. Glue the three 2 inch strips together at the top.
Step 2 – Tie a small bow and attach it to the top of the white ribbon, at the exact spot where you glued them together.
Step 3 – Glue the googly eyes on and attach it to the alligator clip.
At less than fifty cents a piece, I don’t have to worry about sending these clips to school with my girls…who have each decided that they are going to wear a different clip each day up until Halloween. I hope your little girls will love these bows as much as mine do!


Darling clips! I am going to make the ghosts for my daughter – so fun! Pinned!
love the spider, so cute! I love making hair bows for my girls too – they are so expensive to buy, nice job!
Those are adorable! I want to make one for my daughter now!
Love the little owl. I used to make hair clips years ago when my daughter was tiny. So much fun.
i love the little candy corn ones!
What a cute idea! love these clips! And they look so easy to make! yay!
Those are so cute! If I had little girls, I would totally makes some of these for them to wear.
These are so cute. Almost makes me want a preschooler again. Almost.
I love the ghost clips. That is one of my girls favorite one.
these do look easy and super cute thanks for sharing them!
That is a good tip particularly to those fresh to the blogosphere.
Brief but very precise info… Many thanks for sharing this one.
A must read post!