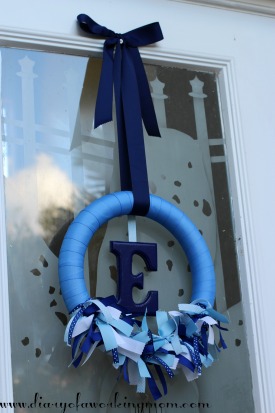
A few weeks ago, I saw a ribbon wreath on Pinterest. It wasn’t anything that I’d seen before – it was intended to announce the birth of a new baby, made in blues or pinks with an initial placed right in the center. I really wanted one. Unfortunately, all the pins that I found of these wreaths lead straight to Etsy shops, and according to the ordering instructions, I was a bit too late to purchase one. Plus, they were a bit pricey.
I pinned a few of the baby wreaths to my boards and put it on my goals list for my 38 week pregnancy update post, hoping that I’d have a little extra time to make one. Turns out, with my maternity leave starting last Friday, I was able to find some time…and I was shocked at how easy it was. The entire project took maybe a 3 hours – tops – most of which was drying time for the paint on the letter and the Mod Podge seal.
I’m so happy with how it turned out! I can’t wait for this wreath to be a permanent fixture on our door once our baby is actually here (and later on the door to his room).
For this craft you will need:
Foam wreath form (mine was 14″)
(3) Spools 1 1/2″ grosgrain ribbon – 2 in one color, 1 in a contrasting color
Wood letter, 5″ size
Acrylic paint
Mod Podge
Paint brushes
Pins
Hot glue
Assorted ribbon (mine ranged from 3/8″ to 1″ size)
Step 1 – Using the two spools of similar color 1 1/2 inch ribbon, wrap the wreath form until completely covered and secure with pins. If you stretch it, you might not need all of both spools, but I did. Once you have your entire form covered exactly the way you want it, secure the ends of the ribbon with a dab of hot glue in addition to the pins, making sure that the glued ends are on what will be the back of the wreath.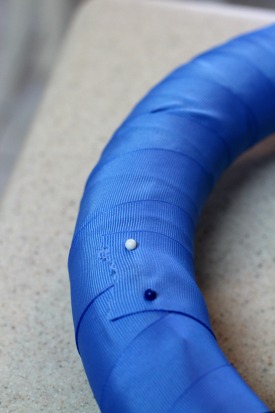
Step 2 – Cut your assorted ribbon to 15″ inch lengths – do NOT cut the remaining spool of 1 1/2 inch ribbon in the contrasting color, leave that aside. Once the assorted ribbon is cut, proceed to tie around the wreath form, saving one piece to connect the letter to the wreath (see step #5 below). You want this part of the wreath to be full, so as you tie the ribbons on, make sure you push them together. It also helps if your knots aren’t all in a straight row.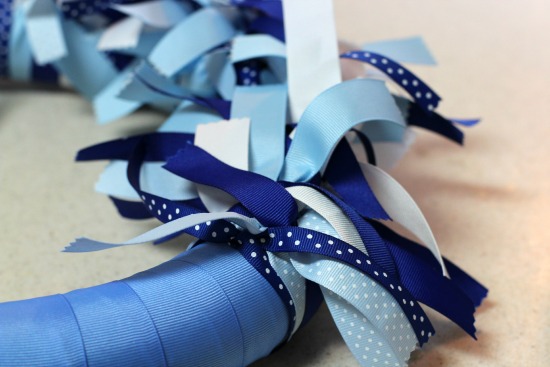
Step 3 – Paint the wood letter. A huge shout out to Basics brand acrylic paint – it’s a little more expensive than some other acrylic paints, but it only took one coat to cover the whole letter and I have a ton left. Allow paint to dry completely.
Step 4 – To seal the letter, cover with one coat of Mod Podge and allow to dry completely. You could also use a glossy spray sealant, but I didn’t have one so I just used Mod Podge.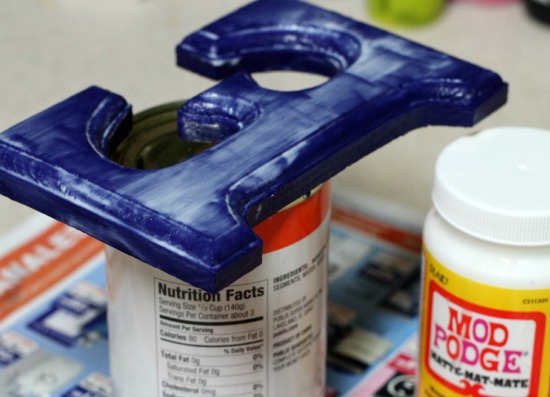
Step 5 – Take the remaining piece of ribbon from Step 2 and affix it to the top middle of the wood letter on the back using hot glue.
Step 6 – To hang the wreath, take the remaining 1 1/2″ spool of ribbon and wrap it around the wreath, tying at the top. Adjust it to make sure that you have the perfect length.
Step 7 – While the wreath is hanging up, attach the ribbon with the wooden letter (from step #5) to the 1 1/2″ inch ribbon that the wreath is hanging from. Attach on the back of the wreath using pins (the pins allow you to move it around in the event that it doesn’t go on straight). Once you find the perfect placement, use a dab of hot glue to secure. 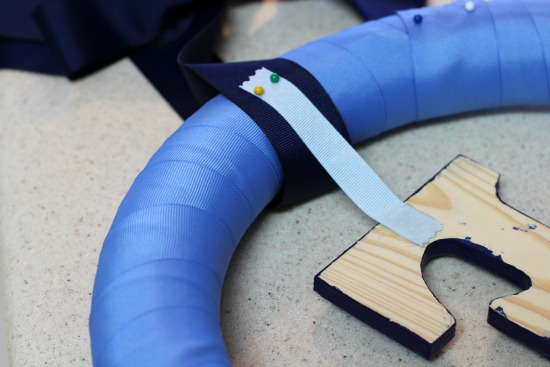

What a great idea–my neice is having a baby in February and my Mom is super crafty!! She would probably love making this for her first great grandchild (in pink it turns out)
Sure cute and what a neat idea!
What an easy to make craft that adds a touch of personalization! You can even do it for a birthday party too and use the initial of the birthday child/person.
Thanks! I totally agree – it would be a great wreath for a birthday party! You could also do it for a bridal or baby shower…
This is such a cool idea! I wish I had found it 2 years ago! 🙂
How cute and what a great idea! thanks for sharing!
So pretty and such a great idea! If I ever have children, I might have to try something like this.
Very cute Jennifer! I wish I would have done something like this when Mia was born.
This would be an awesome decoration for a baby shower that could be used in your child’s room later. I’m really paranoid about people knowing things about me before I’ve met them so I wouldn’t ever hang something like this on my house. Even in our rural area there was an attempted kidnapping of a baby girl a few years back. The kidnappers knew because they had signs displayed in the yard with the name, birth date, weight and measurements of the baby girl saying “Welcome Home”. It’s frustrating that we have to be cautious of sick things like that when it should be a happy occasion.
Wow! How scary! I don’t blame you for being concerned. But I think that is what I like about it – it doesn’t really give much information. I intentionally left off the name, weight, and birth date information plaque because I didn’t want people to know those things. For all passers by know, our last name starts with an E and we like blue. But I’m definitely going to use this on his door (when he has his own room…because he won’t have one of those for a while).
I am NOT crafty but I really want to try this out for my coworker. Great idea!
Pingback: john lewis partnership plc annual report 2012
Pingback: www.pushhockey.co.uk