Mod Podge is my bestie. Okay, maybe it’s weird to name a jar of what is essentially paste, your best friend, but why not? I mean it can do so, so many things. I’m only sorry that it took 33 years for me to meet its acquaintance (just in case you’re wondering, we met last year, and I’m currently 34). Can you imagine what I could have created as a kid if we had this stuff? It seems that in all the crafty Pinterest pins that I fawn over, Mod Podge is listed as one of the ingredients.
Which brings me to this pin that I pinned sometime over the holidays. There was no website or blog attached to it, but just basic directions including spray painting a board of wood, using Mod Podge, placing a picture (printed on regular printer paper) on top, sanding the edges, then using Mod Podge again. They then screwed in hook eyes and attached ribbon to hang it. Um, okay, but I had questions. Did the black show through the picture? Where their bubbles? Did the picture or wood warp at all? Where do you get hook eyes? How hard was it to screw them in? This is why I need a website tutorial. It’s like I can’t craft without one.
Most importantly, since I have no scrap wood laying around – I wanted to know if I could do this on canvas. I’d seen people do transfers before but it normally involved printing a picture on tissue paper then placing it on the canvas. Considering my printer hates me, I don’t even want to try pissing it off with jamming tissue paper in it. There was also a more sophisticated technique that involved printing the photo in reverse, attaching it, waiting over night, and then immersing it in water, but who has the time for that? Not this mom.
Today, I’m thrilled to inform you that there is an easier way: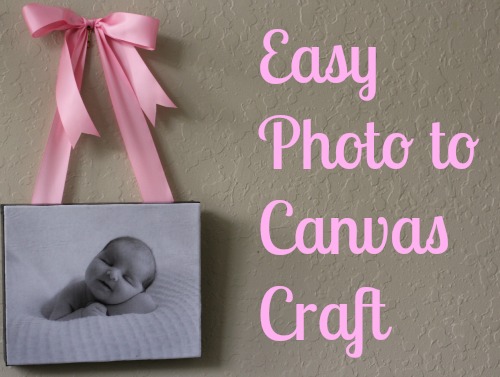
And here’s what you’ll need to do it:
Canvas
Mod Podge
Picture printed on regular printer paper
Hot glue
Ribbon
X-acto Knife
Sandpaper/Nail file
Sponge tip paint brush
Credit card/Debit Card/AAA card – anything flat and plastic
Step 1 – Print a picture using your printer using regular printer paper. Not cardstock. Not tissue paper. Regular white printer paper. I chose a black and white newborn picture of Hazeline that I’ve always wanted to put on canvas.
Step 2 – Paint the canvas black and allow time to dry. I propped mine up on canned veggies to make sure that it wouldn’t stick to the paper towel.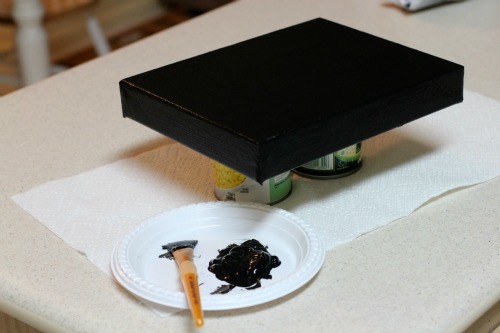
Step 3 – Using the foam brush, cover the top of the canvas with a thin layer of Mod Podge. Lay the picture on top of the Mod Podge and press to affix the picture. Then use the credit/debit card to push the bubbles and wrinkles out from underneath the picture. When all bubbles are out, allow time to try.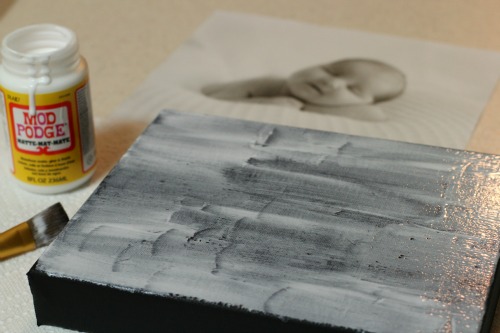 Please note that in this picture I was using a regular paint brush to spread the Mod Podge, but that ended up being a huge mistake. Because it’s an adhesive, it began to tear apart the paint brush, leaving little bristles all over the canvas. I had to dig them up with my finger nails which was annoying and messy. Please, please use a sponge tip brush!
Step 4 – Using the X-acto knife, trim the excess paper from the picture. Once you’ve trimmed off all you can, use the sandpaper (or nail file) and rub it along the sides of the paper, trimming off the remaining excess. If either the knife or the sandpaper disturb the black paint, don’t worry, you can touch it up later or leave it that way for a more rugged look.
Step 5 – Touch up the black paint on the sides of the canvas if you want to. Once you’re happy with it, cover with another layer of Mod Podge – including the sides of the canvas – and allow time to dry.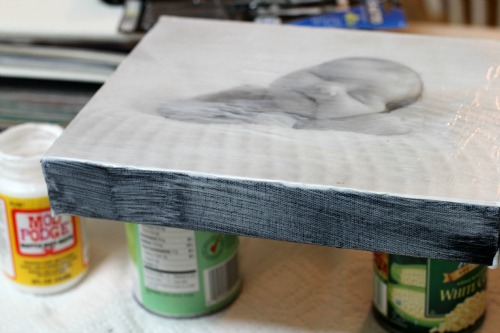
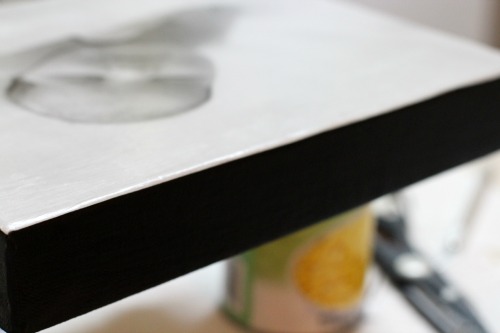
Step 6 – Using hot glue, attach your ribbon to the back of your canvas. Remember to do it at an angle or it won’t hang right.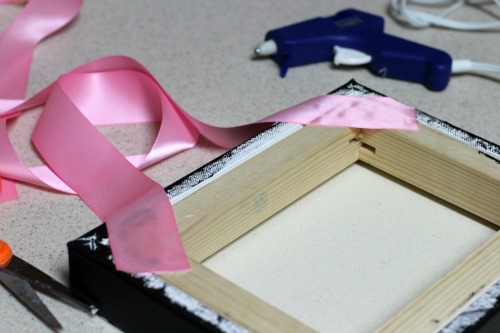
Hang it up in a place where you will see it every day and enjoy your fabulous creation! The photo looks a little grey-ish here, but I promise, it’s just the lighting. Why can’t I get a house that has a perfect lighting spot for pictures? Is that really too much to ask?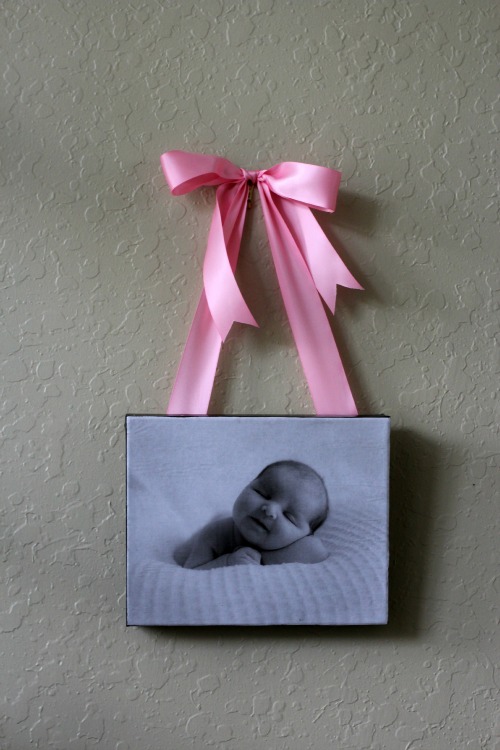
The key to this project is to appreciate its little flaws – my picture has a few small wrinkles under it (left hand corner), but it still looks great. All my edges aren’t perfect, but unless you took it off the wall, you’d never know it. And I just love that you can see the texture of the canvas in some places; it’s very authentic. The best part? This whole project cost about $9 (after coupons and supplies I already had)! Mod Podge really is my bestie!
Happy Crafting!


Thank you for sharing it came out beautiful. This would make a great gift to give to my boys teachers. at the end of the year. Of course with a picture of teh children and the teacher. LOL My I share it?
Absolutely – You are always welcome to share anything on my site! Thanks for visiting!
I never thought that this would be so easy to do. What a cutie pie in the picture btw. Precious!
I love crafts, but believe it or not I have never tried modge podge! I need to start that hobby I think!
This is super cute! I especially love the ribbon to hang it up!
Cool idea for a grandparent gift! Found you through the Friendly Friday blog hop http://georgielee.blogspot.com
Love this! I’m putting photos of my SIL and her husband on canvas for their baby shower :)) Do you really need to paint the whole canvas black… or could you cheat and just do the edges?
One of my photos is more white than black, so I think I’m going to leave one white and paint just one to save time. Thanks for sharing.
You know, when I started the project, I was scared that the black on the canvas was going to show through the picture. I figured the moisture of the Mod Podge + black canvas underneath + black and white photo would equal disaster, but it didn’t. I suppose for time sake, you could cheat and only do the edges – I don’t see why it wouldn’t work. Also, a comment on my photo on wood plaque post indicated that they had problems using color photos with their project (although I did not have those problems), so you might want to stick with back and white pictures. Good luck and let me know how it turns out!
I have looked at so many posts so I can do my very own canvas project and yours was the only one I found that answered all my questions. Thank you and wish me luck!! 🙂
I’m so glad I could help! Let me know how it turns out!
Thank you for sharing this tutorial :-). I have recently started doing crafts after years of wanting to and have discovered … let’s just say .. I’m not a natural and things are just not turning out like the pictures! So, having tutorials like this are very helpful. I love this piece of work 🙂
So glad I could help! Happy crafting!
Pingback: Nahut Blog